Anúncios
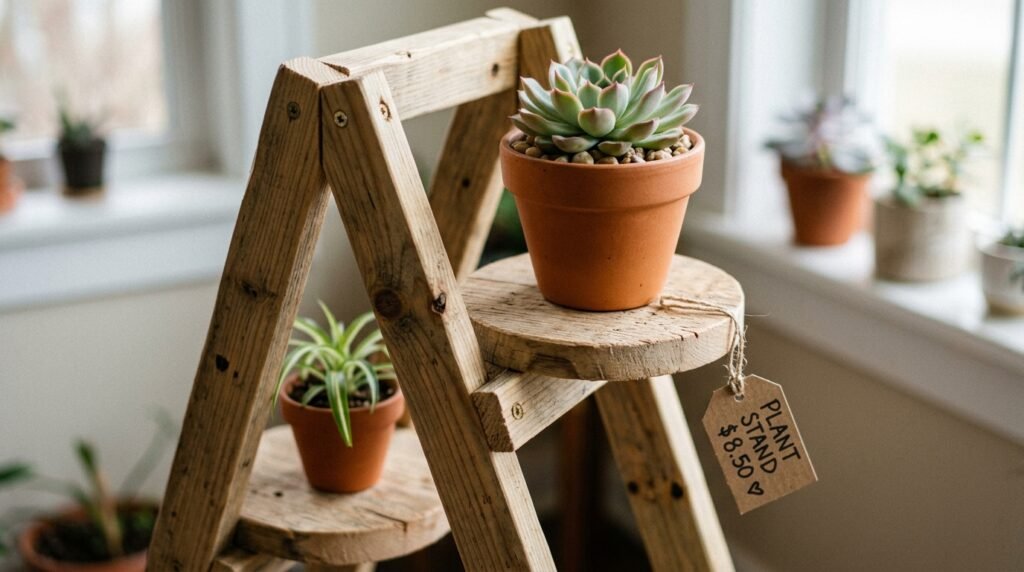
Buying a beautiful snake plant feels amazing until you check the price tag on the matching wooden stand. Retailers casually charge fifty dollars for four tiny pieces of wood glued together. Leaving your heavy pots directly on the floor makes your living room look messy and unfinished. You need affordable DIY plant stand ideas to get your greenery off the carpet without emptying your wallet.
I refused to spend my grocery budget on a simple wooden pedestal for my Denver apartment. You can easily build gorgeous, sturdy bases using basic supplies from your local craft store or thrift shop. Creating custom risers takes less than an hour and costs roughly the price of a cheap fast food meal.
Why implementing DIY plant stand ideas saves massive space
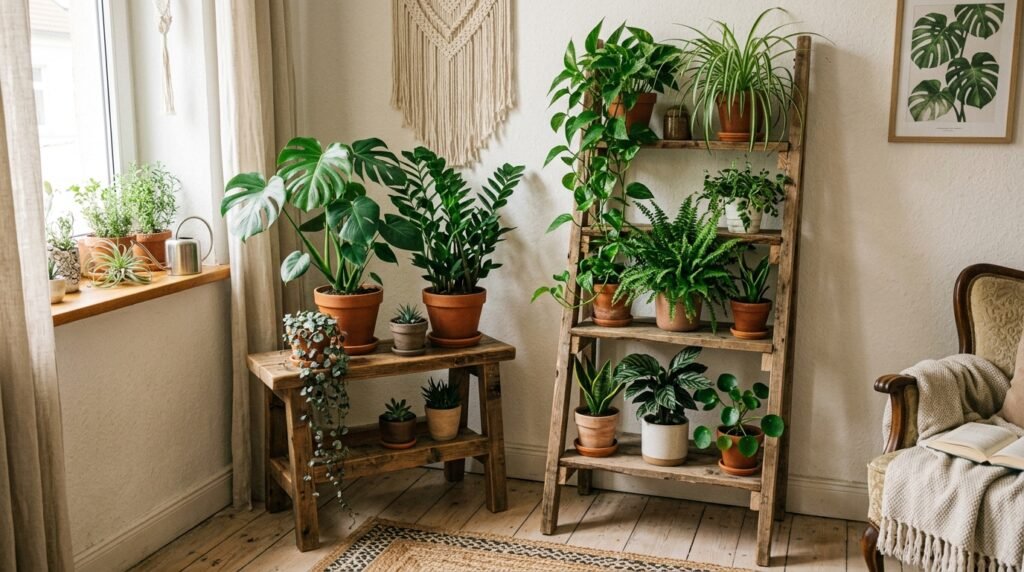
Raising your pots off the floor provides a crucial visual trick for cramped rental units. Staring at five pots grouped tightly on the floor creates a heavy, cluttered feeling immediately. Lifting them at varying heights forces the human eye upward and creates natural breathing room.
The visual shift makes a low apartment ceiling feel significantly taller than it actually is. Creating vertical interest forms the backbone of how to add plants to a small apartment without it feeling crowded. You reclaim your precious walking path and protect your carpet from muddy water stains.
You absolutely do not need power tools to build these functional pedestals. A strong tube of construction adhesive and a little creativity replace the need for expensive drills completely. Building your own furniture empowers you to customize the exact dimensions for your specific apartment corners.
Anúncios
Project one: The wire basket flip
This project requires almost zero physical effort and looks incredibly modern. You just need a cheap wire wastebasket from the Target dollar section or a local thrift store. I found a matte black wire basket at Goodwill on South Broadway for exactly three dollars.
The geometric wire frame looks highly sophisticated when you turn it completely upside down. The open wire grid allows sunlight to pass completely through the base of the stand. This transparency keeps the floor space looking light and totally uncluttered.
Step one: Prepping the wire frame
Wipe the metal basket down with rubbing alcohol to remove any greasy fingerprints. If you hate the original color, grab a can of rust-preventing spray paint from the hardware store.
According to DIY experts at Apartment Therapy, applying three incredibly light coats of spray paint prevents ugly drips on thin metal wire. Let the paint dry overnight on your balcony before bringing it inside. Rushing the drying process guarantees you will smudge the wet paint with your thumbs.
Step two: Adding the base plate
You cannot rest a heavy pot directly on the thin wire grid of the overturned basket. The heavy soil will eventually warp the metal or make the pot sit awkwardly crooked. Buy a cheap round wooden plaque from a craft store for roughly four dollars.
Apply heavy construction adhesive to the rim of the wire basket and press the wooden circle down firmly. Place a heavy stack of hardback books onto the wood to clamp it down while the glue cures. The solid wooden top provides a perfect flat stage for your favorite trailing pothos.
Finding weird materials in the hardware store
Walking through the plumbing or garden aisle of a home improvement store sparks massive creativity. You start looking at PVC pipes and cheap paving stones as potential furniture components. Keeping your costs under ten dollars means hunting for raw materials in unexpected retail sections.
Sourcing weird items fits perfectly with finding the best thrift store finds for home decor (and what to skip). A heavy concrete stepping stone costs less than two dollars and provides a brilliant industrial base.
You just have to look past the intended outdoor use and imagine it sitting in your living room. Heavy masonry products add incredible physical weight that prevents your tall greenery from tipping over.
Project two: The stacked terracotta pedestal
Terracotta pots offer incredible structural support and cost almost nothing at hardware stores. You can build a heavy, architectural pedestal that looks exactly like expensive sculptural concrete. This specific project requires two identical terracotta pots and a strong tube of waterproof epoxy.
Do not use standard hot glue because the heavy weight of your plant will snap the bond immediately. Buying basic clay pots keeps your budget extremely low while providing maximum stability for large ferns.
Step one: Gluing the ceramic bases
Turn the first terracotta pot upside down so the wide opening sits flat on your table. Apply a thick ring of epoxy around the flat bottom edge of the overturned pot. Take your second pot and place it right-side up directly onto the glue ring.
You are essentially gluing the two flat bottoms together to create an hourglass shape. Wipe away any excess epoxy that squeezes out of the seam immediately with a damp rag. Let the massive clay structure sit completely undisturbed in a dry room for a full day.
Step two: Creating a faux stone finish
Standard orange terracotta looks very basic and belongs on an outdoor patio. You can easily disguise the cheap ceramic using leftover wall paint mixed with baking soda. The baking soda creates a thick, chalky paste that mimics the heavy texture of expensive limestone.
Slap the textured paint onto the joined pots using an old stiff bristle brush. This textured paint hack ranks among my absolute favorite DIY plant stand ideas for faking expensive materials. Your friends will assume you bought a heavy concrete pedestal from a high-end boutique.
Protecting your floors from watering damage
Putting a heavy homemade structure directly onto your rental floor carries a slight risk. Rough wood and unglazed ceramic will severely scratch standard apartment flooring if you drag them. You must attach thick felt furniture pads to the bottom of every single project you build.
You can buy a massive pack of sticky felt pads at any dollar store for cheap. Watering your greenery also poses a serious threat to your new custom stands. A leaking plastic pot will ruin untreated wood and dissolve cheap water-based paints very quickly.
The hidden plastic drip tray trick
Here is a highly specific trick to protect your hard work from daily moisture. Buy a cheap plastic drip tray that fits completely inside the bottom of your decorative planter. The plastic saucer catches the excess muddy water before it ever touches your new wooden stand.
This invisible layer of protection keeps your DIY plant stand ideas looking brand new for years. You can water your thirsty ferns without panicking about ruining your custom paint job.
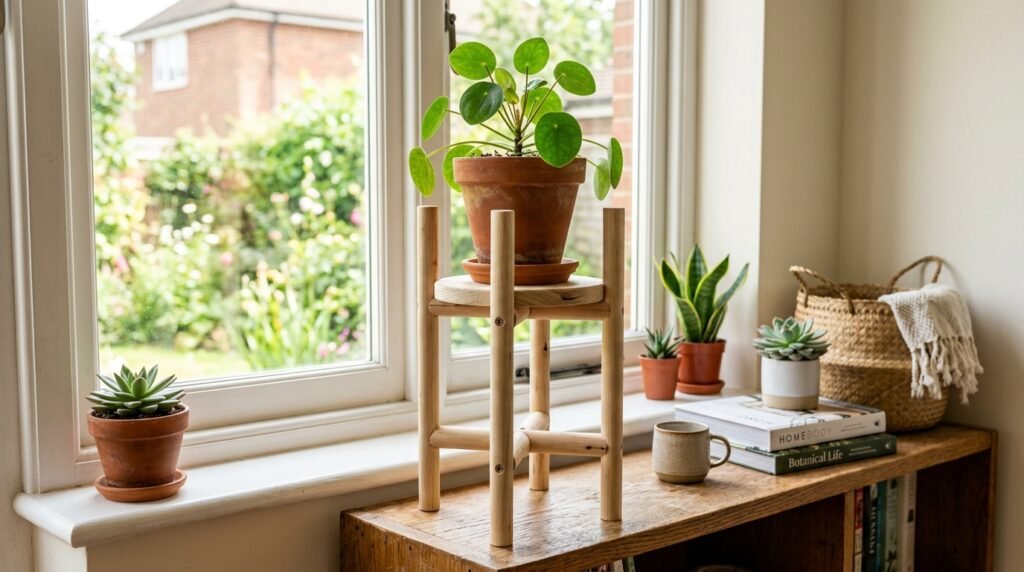
Project three: The mid-century modern dowel stand
Mid-century wooden furniture costs a fortune because of the sleek, tapered leg designs. You can mimic this expensive aesthetic using basic wooden dowels and a pre-cut wooden circle. You need one round wooden plaque and three thick wooden dowels from the local craft store.
The entire materials list usually totals around nine dollars at any major hobby shop. You gain a beautiful piece of custom wooden furniture for the price of a cheap coffee.
Step one: Measuring the leg placement
Turn your wooden circle upside down and mark three dots evenly spaced around the outer edge. You must measure this carefully to prevent the final table from wobbling dangerously. Apply a massive drop of heavy wood glue directly onto each pencil mark you made.
This simple construction method skips the complicated joinery used in expensive retail furniture. Keep a damp paper towel nearby to wipe up any glue that drips down the sides.
Step two: Attaching the wooden legs
Press the flat end of each wooden dowel firmly into the wet glue spots. You have to let this dry completely upside down for at least twenty-four hours. Trying to flip the stand over before the glue cures will snap the legs off instantly.
Writers at The Spruce warn that wood glue needs a full day to reach maximum structural strength. The patience required here saves you from a collapsing project later in the week.
Customizing your raw wood with stain
Raw craft wood looks incredibly cheap and unfinished sitting next to your nice living room sofa. You need to apply a rich wood stain to make the pine look like expensive walnut or oak. You do not need to buy a massive can of expensive liquid wood stain for this tiny project.
I wipe cheap dark brown shoe polish onto raw wood using an old rag. The thick wax protects the wood slightly and provides an incredibly rich tone.
Sealing the stained wood properly
The shoe polish absorbs into the grain perfectly and provides a beautiful dark finish for under three dollars. This weird staining method matches the logic found in how to upcycle old furniture with paint and new hardware. Always wipe a layer of clear polyurethane over the dried stain to protect the finish.
Condensation from a cold watering can will leave terrible white rings on unsealed wood. Sealing the wood guarantees your cheap craft supplies survive the harsh reality of indoor gardening.
Matching your stands to your room aesthetic
Building your own custom pieces means you control the exact color palette completely. You never have to settle for the weird orange-toned wood sold at big box retail stores. You can paint your new pedestals to match your existing living room wall color exactly.
This creates a brilliant monochromatic look where the pot seems to float magically in the corner. I keep my personal aesthetic very warm with lots of natural wood and matte black metal. Finding the right DIY plant stand ideas allows me to maintain this cohesive style on a tight budget.
Building your creative confidence
Testing these specific DIY plant stand ideas builds massive confidence for tackling larger apartment projects later. You start looking at basic construction materials as an opportunity rather than a limitation. Keeping the projects small and cheap removes the intense fear of failure completely.
If you accidentally ruin a three-dollar craft store wood circle, you just throw it away. Exploring new DIY plant stand ideas makes spending a Saturday afternoon crafting incredibly relaxing and rewarding.
Knowing weight limits
Always test the physical strength of your new base before adding a heavy ceramic planter. Place a large stack of heavy books on the stand and leave it overnight. If the wooden legs bow or the epoxy cracks, the stand cannot support your massive rubber tree.
Reserve your cheaper handmade items for lightweight plastic pots and small trailing pothos varieties. Reviewing your favorite DIY plant stand ideas ensures you match the correct base to the appropriate ceramic pot size. Safety must always remain your top priority when raising heavy wet soil.
Run to the craft store today and grab a simple wooden plaque to start building. Testing out these affordable DIY plant stand ideas completely transforms your empty corners without destroying your monthly budget. Get your beautiful greenery off the rental carpet and give it the display pedestal it actually deserves.

Fabiana Moura is a decor enthusiast and renter based in Denver, CO. After five moves in eight years, she became obsessed with making small spaces feel like home — without renovation, without a big budget, and without losing the security deposit. At Inovaty, she shares everything she’s learned along the way.