Anúncios
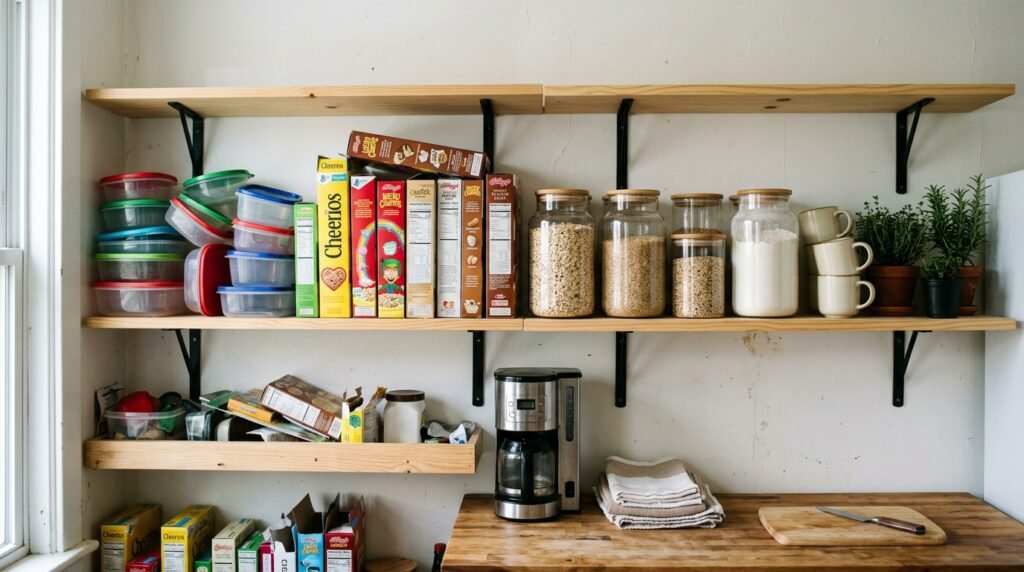
Staring at a pile of mismatched plastic Tupperware sitting on a wooden board kills the mood of your entire kitchen. You thought taking the cabinet doors off would make the room feel larger. Now you just have a public display of your chaotic cereal box collection. Open storage demands a high level of visual discipline.
I lived in a tiny Capitol Hill unit where the upper cabinet doors literally fell off their rusty hinges. I asked the landlord to fix them, but he ignored my requests for weeks. I eventually unscrewed the rest of the hinges myself and embraced the exposed wooden planks. I quickly learned that displaying bright red plastic cups next to green coffee mugs looked absolutely terrible. I had to rethink everything I stored at eye level.
The core rule of how to style open kitchen shelves
You cannot treat exposed storage exactly like a closed cabinet. A solid wooden door hides your ugly protein powder tubs and mismatched travel mugs safely in the dark. Exposed boards act as a highly visible display case for your daily life.
Pull absolutely everything off the wood and wipe the surface down. Box up the ugly plastic containers and put them in a lower drawer. You only want to display items you actually enjoy looking at while you cook your dinner.
Editing your inventory brutally
Living in a small apartment forces you to confront your own clutter constantly. You do not need twelve different coffee mugs if you live alone. Keep your four absolute favorite mugs and donate the rest to a local thrift shop.
Anúncios
Fewer items make the remaining pieces look significantly more expensive. This strict editing process forms the foundation of good organization. You must clear the physical clutter before you can build a beautiful arrangement.
Step 1: Establish a strict color palette
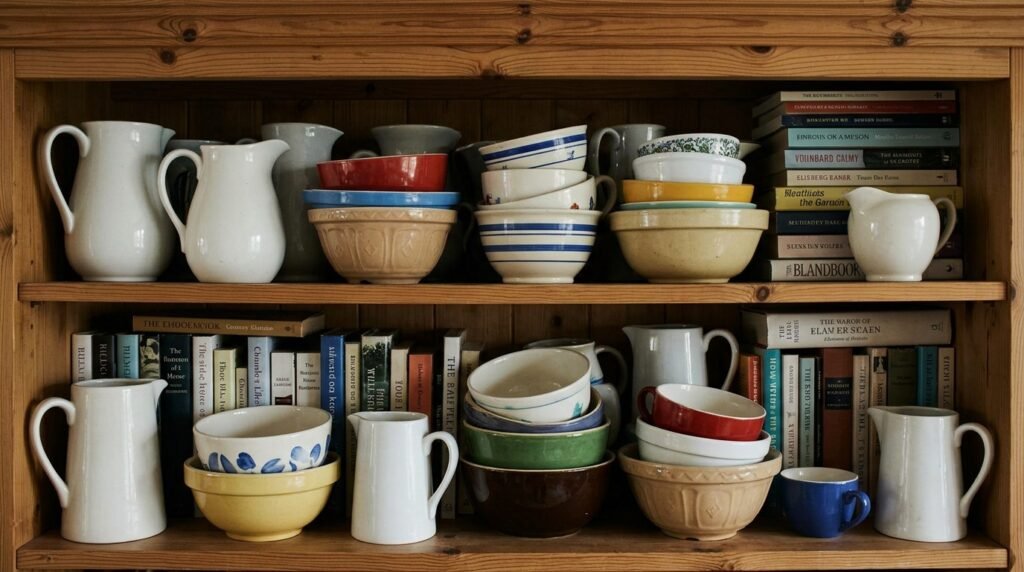
Learning how to style open kitchen shelves starts with extreme color control. A rainbow of different dishes creates immediate visual clutter. The human eye does not know where to land when it sees too many contrasting shades packed together.
Pick two main colors and stick to them strictly. I use plain white plates and heavy clear glassware for my everyday setup. This neutral base prevents the wall from looking like a messy retail clothing rack.
Mixing textures instead of loud colors
You add visual interest through texture rather than bright patterns. A ribbed glass pitcher looks beautiful sitting next to a smooth white ceramic bowl. The lack of loud colors keeps the display calm and highly intentional.
I bought a set of heavy, textured white plates from Target for exactly twenty dollars. They look incredibly high-end just because they feature a matte finish instead of a cheap glossy glaze.
Step 2: Hide the ugly essentials in woven baskets
You still need a place to keep your plastic wrap and loose tea bags. You cannot just leave those cardboard boxes sitting out in the open. Woven baskets solve this massive aesthetic problem instantly.
I buy square water hyacinth baskets for about fifteen dollars each. They fit perfectly on my standard twelve-inch deep boards. I shove all my ugly baking supplies and snack bags straight into them.
Choosing the right basket size
Make sure the basket sits completely flush with the front edge of the wood. A basket hanging over the edge looks messy and creates a falling hazard. Using baskets effectively is a core strategy if you need to organize a tiny kitchen without extra cabinets.
The woven material adds much-needed warmth to a room full of cold metal appliances. Grouping two identical baskets together creates a clean, uniform look that hides your necessary chaos.
Step 3: Anchor the bottom tier with heavy items
Visual weight matters deeply when arranging items on a tall wall. Placing heavy cast iron pots on the very top board makes the room feel top-heavy. You must ground the arrangement by keeping heavy things down low.
Place your large stacks of daily dinner plates directly on the lowest level. Keep your heavy ceramic mixing bowls right next to them. This creates a solid foundation for the rest of the display.
Keeping daily dishes accessible
The lowest tier should hold the items you touch multiple times a day. You should never need a step stool just to grab a coffee mug at six in the morning. Function always has to dictate the final placement of your items.
Putting heavy items down low also prevents major accidents. You do not want to reach high above your head to grab a slippery glass bowl with wet hands.
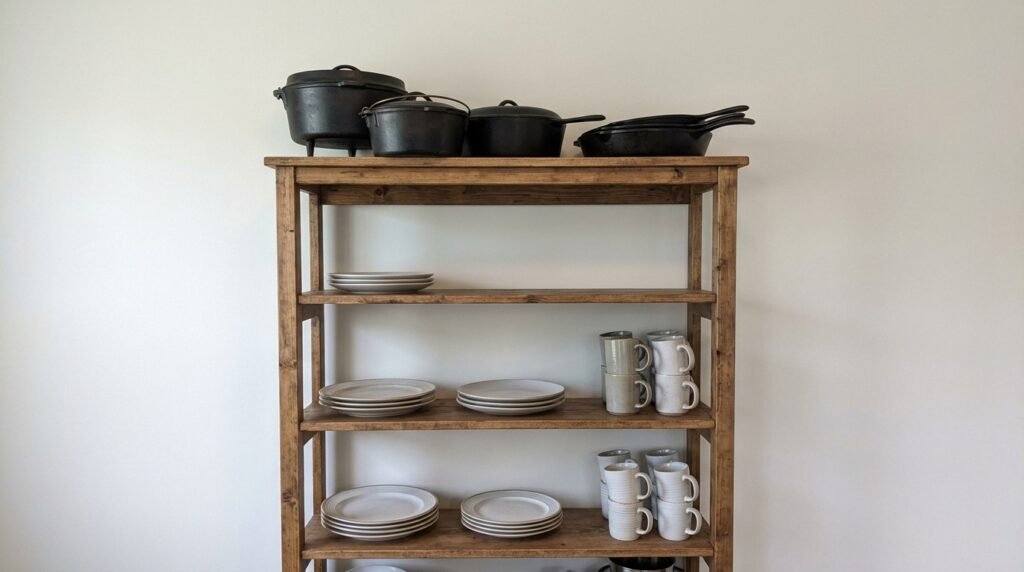
Step 4: Stack your dishes vertically and horizontally
A long row of identical coffee mugs lined up like soldiers looks incredibly rigid. You want the arrangement to feel organic and natural. You achieve this by mixing the physical orientation of your items.
Stack four white dinner plates horizontally on the board. Place a tall ceramic pitcher right next to that short horizontal stack. The varying heights force the eye to bounce up and down across the wall.
The specific rule of threes
Group your items in odd numbers to create a relaxed feel. Three matching soup bowls look significantly better than a stack of four or two. Stacking items in groups of three helps avoid a sterile, commercial appearance.
You can lean a small saucer up against the wall behind a stack of two bowls. This simple trick adds depth and builds a perfect triangle shape that looks professionally arranged.
Step 5: Add warm natural elements
Kitchens naturally feature a lot of cold materials like tile, stainless steel, and glass. You have to introduce warmth to keep the room from feeling like a strict laboratory. Wood provides the absolute best counterweight to those cold surfaces.
Lean a large, heavy wooden cutting board against the back wall behind your plates. The wood grain acts exactly like a piece of custom art. It brings a deep, rich tone to a blank white wall.
Sourcing cheap wooden accessories
Do not pay retail prices for wooden bowls or thick cutting boards. Secondhand shops constantly carry gorgeous wooden pieces for pennies. Knowing the best thrift store finds for home decor (and what to skip) will save you serious money on these warming elements.
I found a massive acacia wood serving tray at Goodwill for four dollars. I washed it thoroughly and oiled it before leaning it on my bottom tier. It completely changed the temperature of the room.
Step 6: Decant your dry goods into clear glass
Bright yellow pasta boxes and red flour bags ruin a neutral aesthetic immediately. You must remove the commercial packaging to maintain a clean look. Glass jars offer a cheap and beautiful storage solution.
Buy a pack of large mason jars from the grocery store for ten dollars. Pour your rice, oats, and coffee beans directly into the clear glass containers. The actual food becomes the decoration.
Labeling your jars correctly
Use a cheap label maker to print simple black text for the bottom of each jar. Sticking the label on the bottom keeps the front of the glass completely clear. This highly practical tip stops you from mixing up the powdered sugar and the baking soda.
Decanting your dry goods also keeps them fresher for much longer. Tight glass lids lock out the stale apartment air and prevent common pantry pests from invading your food.
Step 7: Introduce low-maintenance trailing plants
A kitchen needs actual signs of life to feel truly welcoming. A single green plant softens the harsh right angles of the wooden boards. Trailing plants work perfectly because they draw the eye downward.
Place a small pothos plant on the top corner of your display. Let the green vines drape down over the side of the wood. The organic shape breaks up the rigid lines of the stacked dishes.
Managing watering day
Keep the plant in a cheap plastic nursery pot inside a nicer ceramic planter. You can easily pull the plastic pot out and water it directly in the sink. This prevents dirty water from ruining your clean white dishes below.
Plants breathe life into stagnant air and add a beautiful pop of natural color. For more tips on greenery, read about how to add plants to a small apartment without it feeling crowded.
Step 8: Leave empty negative space
The biggest mistake renters make is filling every single inch of available wood. Packing items tightly together creates a suffocating wall of stuff. Your eyes need blank space to rest.
Leave at least a few inches of completely empty air between your different groupings. This negative space frames the objects and makes them look important. A little bit of empty air goes a very long way.
Avoiding the grocery store aisle look
If the wood looks like a packed supermarket aisle, you have too much out. Remove one item from each cluster and step back to evaluate. Less stuff always makes the remaining items look much more expensive.
Give your favorite pieces room to breathe. A beautiful ceramic pitcher looks best when it sits completely alone on the end of a board.
Maintaining your new exposed storage
Figuring out exactly how to style open kitchen shelves takes a bit of trial and error. You will likely move things around three or four times before it feels right. That shifting process is completely normal and part of the fun.
You also have to commit to washing your dishes regularly. You can no longer hide dirty bowls in the sink when the display wall looks completely bare. The system forces you to maintain a cleaner home.
Dust the exposed wood with a damp cloth every two weeks. Airborne cooking grease attracts dust incredibly fast in a small kitchen. A quick wipe down keeps the display looking fresh and sanitary all year long.
Go into your kitchen right now and remove every single item from your upper area. Box up the mismatched plastic containers and only put your favorite ceramic pieces back up. Leave one completely empty gap between your plates and your glasses to instantly create breathing room.

Fabiana Moura is a decor enthusiast and renter based in Denver, CO. After five moves in eight years, she became obsessed with making small spaces feel like home — without renovation, without a big budget, and without losing the security deposit. At Inovaty, she shares everything she’s learned along the way.